Adding CSS Styles
စာလုံးတွေရဲ့ size တွေ အရောင်တွေ နောက်ပြီးတော့ space တွေ အတွက် HTML code အပြင် CSS ကိုပါထည့်သွင်းပြီး အသုံးပြုကြတယ်။ CSS ရဲ့ အရည်ကောက်ကတော့ Cascading Style Sheets လို့ ခေါ်ပါတယ်။ အခု Chapter မှာ CSS အကြောင်းကို လေ့လာလို့ ရမှာပါ။ CSS ဟာ HTML5 မှာ အရေးကြီးပါတယ်။ အရင် HTML version က ပြုလုပ်လို့ရတဲ့ အရာတွေကို အခု HTML5 မှာတော့ CSS နဲ့ မဖြစ်မနေ အသုံးပြုမှ ဖြစ်မှာပါ။
Style Sheets
HTML5 မှာ ကျွန်တော်တို့တွေ အနေနဲ့ heading တွေ paragraphs , list , image စတာတွေ အပြင် အခြား video , music စသည့် multimedia အပိုင်းတွေ လည်း ပါဝင်ပါတယ်။ ကျွန်တော်တို့ရဲ့ content ကို ဘယ်လို မြင်ချင်တယ် ဘယ်လိုမျိုးပုံစံနဲ့ ဖော်ပြချင်လဲဆိုတာကို Cascading Style Sheets သို့မဟုတ် CSS ကို အသုံးပြုရပါတယ်။ CSS က color , font families, backgrounds , margin ,padding စတာတွေ အခြား အများကြီးကို ဖန်တီး ထိန်းချုပ်ပေးပါတယ်။ CSS ကို HTML အတွင်းမှာ ဒါမှမဟုတ် သီးသန့် file အနေနဲ့ အသုံးပြုလို့ရပါတယ်။ HTML လိုမျိုး CSS ဟာလည်း text file တစ်ခု ဖြစ်ပါတယ်။ external css ကို ကျွန်တော်တို့တွေ .css ဆိုပြီး သိမ်းပါတယ်။
Create an Internal Style Sheet
HTML မှာ internal style sheet နဲ့ external style sheet ဆိုပြီး ၂ မျိုး အသုံးပြုနိုင်ပါတယ်။ internal style sheet ကို <style> နဲ့ </style> ကြားမှာ ရေးသားရပါတယ်။ ကျွန်တော် တို့တွေ အောက်က CSS example လေးကို ကြည့်ရအောင်။
<!DOCTYPE html>
<html>
<head>
<meta charset="UTF-8">
<title>CSS</title>
<style>
h1 {
color:red;
}
.myclass {
color:orange;
}
#myid {
color: blue;
}
</style>
</head>
<body>
<h1>This is header</h1>
<p class="myclass">Color green</p>
<p id="myid">Color blue</p>
</body>
</html>
```
အဲဒီ code လေးကို ကျွန်တော်တို့တွေ အောက်ကလို မြင်ရပါလိမ့်မယ်။
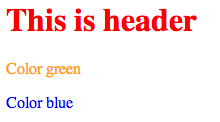
Figure 3-1
CSS မှာ tag name , class နဲ့ id ဆိုပြီး ၃ ခု ကို အသုံးပြုပါတယ်။ tag name ကတော့ HTML tag name တွေပေါ့။ p , h1,h2 စတာတွေပေါ့။ အပေါ်က ဥပမာမှာ ကျွန်တော်တို့ h1 ဆိုတဲ့ tag name ကို အသုံးပြုထားပါတယ်။ class ကတော့ dot (.) လေးနဲ့ တွဲပြီး အသုံးပြုပါတယ်။ class ကို ကြေငြာချင်ရင် class="myclass" ဆိုပြီး ရေးပါတယ်။ ကျွန်တော်က myclass ဆိုပြီး နာမည်ပေးထားခဲ့ပါတယ်။ ဒါကြောင့် .myclass ဆိုပြီး သုံးထားပါတယ်။ id ကတော့ # နဲ့ အသုံးပြုပါတယ်။ id ကို HTML tag မှာ id="myid" ဆိုပြီး အသုံးပြုတယ်။ အခု ဥပမာမှာ myid လို့ နာမည်ပေးထားတယ်။ ဒါကြောင့် #myid ဆိုပြီး အသုံးပြုထားပါတယ်။
class နဲ့ id ကွာခြားချက်ကတော့ id က တစ်ခု တည်း အနေနဲ့ အသုံးပြုပြီး class ကတော့ တစ်ခု မက အသုံးပြုပါတယ်။ id="myid" လို့ ပေးထားတဲ့ အတွက် ထပ်ပြီးတော့ id နာမည်ပေးတဲ့ အခါ myid ဆိုပြီး ထပ် မပေးတော့ပါဘူး။ class ကတော့ ထပ်ပြီး ပေးခွင့်ရှိပါတယ်။ class="myclass" လို့ ပေးထားတဲ့ အတွက် အခြား နေရာမှာလည်း ဒီ class ကို ပဲ အသုံးပြုချင်ရင် class="myclass" ဆိုပြီး ထပ်ပေးလို့ရပါတယ်။
css ကို စရေးရင် { နဲ့ စပြီးတော့ } နဲ့ ဆုံးပါတယ်။ အဲဒီ ကြားထဲမှာ code ရေးပါတယ်။ color:orange; ဆိုတာကတော့ စာလုံး အရောင် လိမ္မော်ရောင် သုံးမယ်လို့ ဆိုထားတာပါ။ code တစ်ကြောင်း ဆုံးရင် ; ထည့်ရပါတယ်။
ဒီတစ်ခေါက်တော့ font ပြောင်းကြည့်ရအောင်
```html
<!DOCTYPE html>
<html>
<head>
<meta charset="UTF-8">
<title>CSS</title>
<style>
h1 {
color:red;
font-family: Arial;
}
.myclass {
color:orange;
font-style: italic;
}
#myid {
color: blue;
font-size: 12px;
}
</style>
</head>
<body>
<h1>This is header</h1>
<p class="myclass">Color green</p>
<p id="myid">Color blue</p>
</body>
</html>
အဲဒီ code ကို browser မှာ ကြည့်ရင် အောက်ကလို မြင်ရပါမယ်။
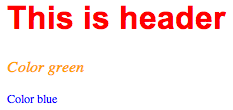
Figure 3-2
အဲဒီ code မှာ font-family: Arial; ဆိုတာကတော့ font ကို Arial သုံးမယ်လို့ ပြောထားပါတယ်။ font-style: italic; ကတော့ font style ကို italic (စာလုံးစောင်း) ပုံစံ သုံးမယ်လို့ ပြောထားပါတယ်။ font-size: 12px; ကတော့ font ရဲ့ size က 13px ကို အသုံးပြုမယ်လို့ ဆိုထားတာပါ။ နောက် chapter တစ်ခုမှာ ဒီထက်ပိုပြီးတော့ CSS ကို ရှင်းပြပေးသွားမှာပါ။
Create an External Style Sheet
External Style sheet ဆိုတာကတော့ CSS တွေကို file တစ်ခုတည်းမှာ ထည့်သွင်းထားပြီးတော့ HTML file ကနေ တဆင့်ပြန်ခေါ်သုံးတာပါ။ ဒါကြောင့် website တစ်ခုထဲမှာ CSS တွေ ထပ်ခါ ထပ်ခါရေးနေစရာမလိုတောပါဘူး။ အခု ကျွန်တော်တို့ CSS file တစ်ခု တည်ဆောက်ရအောင်။ အရင်ဆုံး index.html ကို folder တစ်ခုထဲမှာ ဆောက်လိုက်ပါ။ ပြီးရင် index.html file သိမ်းထားတဲ့ နေရာမှာပဲ style.css ဆိုပြီး file တစ်ခု ဖန်တီးပါ။ .css ကို ဖန်တီးခြင်းဟာ .html ဖန်တီးတာနဲ့ အတူတူပါပဲ။ file extension ကို .css ဟု ပြောင်းပေးရုံသာ ရှိပါတယ်။ တကယ်လို့ မေ့သွားခဲ့ရင်တော့ Chapter 1 မှာ ပြန်လည် ဖတ်ရှုနိုင်ပါတယ်။ ပြီးရင် .css ကို ဖွင့်လိုက်ပါ။ အဲဒီ အထဲမှာ အောက်ကလို ရေးလိုက်ပါ။
/* style.css */
h1 {
    color:red;
    font-family: Arial;
}
.myclass {
    color:orange;
    font-style: italic;
}
#myid {
    color: blue;
    font-size: 12px;
}
/* style.css */ ဆိုတာကတော့ comment ပါ။ comment ရေးတဲ့ အခါမှာတော့ /* နဲ့ စပြီးတော့ */ နဲ့ ဆုံးပါတယ်။ comment ပေးထားတဲ့ အခါမှာ */ နဲ့ မဆုံးမခြင်း လိုင်းကြောင်း တစ်ကြောင်းထက် ပို အသုံးပြုလို့ရပါတယ်။
ကျွန်တော်တို့ index.html ကို အောက်ကလို ရေးရအောင်။
<!DOCTYPE html>
<html>
<head>
    <title>CSS</title>
    <link rel="stylesheet" href="style.css">
</head>
<body>

<h1>This is header</h1>
<p class="myclass">Color green</p>
<p id="myid">Color blue</p>

</body>
</html>
အဲဒီ code လေးကို save လုပ်ပြီး index.html ကို browser မှာ ကြည့်လိုက်ပါ။ Figure 3-2 က အတိုင်း မြင်ရပါလိမ့်မယ်။
အပေါ်က code မှာ <link rel="stylesheet" type="text/css" href="style.css"> နဲ့ CSS ကို ချိတ်ဆက်ထားပါတယ်။ <link rel="stylesheet" type="text/css" ဆိုတာကတော့ CSS ကို အသုံးပြုမယ်လို့ ဆိုထားပြီး href= ကတော့ ဘယ် file ကို အသုံးပြုမယ်လို့ ပြောထားပါတယ်။
ကျွန်တော်တို့ နောက်ထပ် file တစ်ခု ဖန်တီးရအောင်။ index.html နေရာမှာပဲ page2.html ဆိုပြီး ဖန်တီးလိုက်ပါ။ အဲဒီ file ထဲမှာ အောက်ကလို ကျွန်တော်တို့တွေ ရေးထားလိုက်ပါမယ်။
<!DOCTYPE html>
<html>
<head>
    <title>Page 2</title>
    <link rel="stylesheet" href="style.css">
</head>
<body>

<h1>Page 2</h1>
<p class="myclass">My Class</p>
<p id="myid">My id</p>

</body>
</html>
page2.html ကို browser မှာ ကြည့်ရင် အောက်ကလို မြင်ရပါလိမ့်မယ်။

Figure 3-3
အရင် index.html မှာ ရေးထားသလို myclass , myid စတာတွေကို ပြန်ပြီး အသုံးပြုထားပါတယ်။ အဲဒီ class နဲ့ id နဲ့ ဆိုင်တဲ့ CSS တွေကို style.css မှာ ရေးထားခဲ့ပါတယ်။ အဲဒီ css ကိုပဲ page2.html က အသုံးပြုထားတယ်။ ဒါကြောင့် index.html အတိုင်း style က အတူတူ ဖြစ်နေတာကို တွေ့နိုင်ပါတယ်။
Apply a Style Locally
တစ်ခါတစ်ရံ ကျွန်တော်တို့တွေဟာ style ကို class , id , tag တွေနဲ့ သီးသန့် ရေးမယ့် အစား တစ်ကြောင်းထဲမှာ ရေးချင်တဲ့ အခါတွေ ရှိတတ်ပါတယ်။ အဲဒီ အခါ အောက်ကလို မျိုး အသုံးပြုနိုင်ပါတယ်။
<!DOCTYPE html>
<html>
<head>
    <title>Page 2</title>
</head>
<body>

<p style="color:red">Red</p>
<p style="color:green">Green</p>
<p style="color:blue">Blue</p>

</body>
</html>
အဲဒီ code လေးကို browser မှာ ဆိုရင် အောက်ကလို မြင်ရပါလိမ့်မယ်။
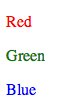
Figure 3-4
လိုင်းတစ်ကြောင်းတည်းမှာ CSS ကို အသုံးပြုချင်တဲ့ အခါ style= ဆိုတဲ့ attribute ထဲမှာ ထည့်ရေးရပါတယ်။
Apply a Style to a Tag
HTML tag တွေကိုလည်း CSS သုံးပြီး လွယ်လင့် တကူပြောင်းလဲလို့ရပါတယ်။ ဥပမာ။ Paragraph က စာလုံးတွေအားလုံးကို Arial font face ထားမယ် စာလုံး ကို 15px ထားမယ် ဆိုပါတော့။ <p> က စာတွေ အားလုံးပြောင်းလဲမှာဖြစ်တဲ့အတွက်ကြောင့် အောက် က ပုံစံလို ရေးလို့ရပါတယ်။
<!DOCTYPE html>
<html>
<head>
    <title>CSS</title>
    <style>
    p {
        font-family: Arial;
    }
    </style>
</head>
<body>
<p>Modern HTML is the standard markup language for structuring and presenting content on the Web. People still commonly say HTML5, but the current standard is maintained as the HTML Living Standard.</p>
<p>HTML works together with CSS and JavaScript. HTML describes the meaning and structure of content, CSS controls presentation, and JavaScript adds behavior. Keeping those responsibilities separate makes pages easier to maintain and more accessible across browsers and devices.</p>
</body>
</html>
p tag တွေ အားလုံးဟာ font က Arial ဖြစ်ပြီးတော့ font-size က 15px ဖြစ်သွားပါမယ်။ အဲဒီ code ကိုပဲ ကျွန်တော်တို့တွေ h1 ထည့်ထားတဲ့ Example လေးကြည့်လိုက်ပါ။
<!DOCTYPE html>
<html>
<head>
    <title>CSS</title>
    <style>
    h1 {
        font-size:200%;
        color:#DDDDDD;
    }
    p {
        font-family: Arial;
    }
    </style>
</head>
<body>
<h1>HTML5</h1>
<p>Modern HTML is the standard markup language for structuring and presenting content on the Web. People still commonly say HTML5, but the current standard is maintained as the HTML Living Standard.</p>
<p>HTML works together with CSS and JavaScript. HTML describes the meaning and structure of content, CSS controls presentation, and JavaScript adds behavior. Keeping those responsibilities separate makes pages easier to maintain and more accessible across browsers and devices.</p>
</body>
</html>
CSS ထဲမှာ h1 tag ကို မီးခိုးရောင် သုံးထားတာ တွေ့နိုင်ပါတယ်။ အဲဒီ code ကို browser မှာ ကြည့်လိုက် ရင် အောက်ကလို မြင်ရပါမယ်။
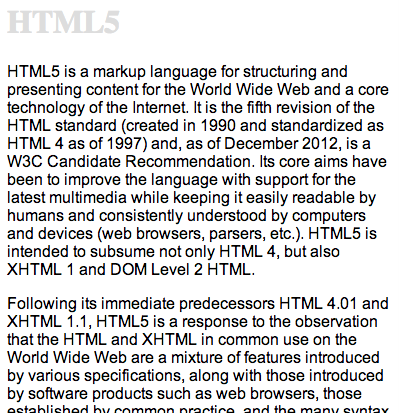
Figure 3-5
Apply a Style Using a Class
ကျွန်တော်တို့တွေ အနေနဲ့ tag နဲ့ class ကို တွဲပြီးတော့လည်း အသုံးပြုနိုင်ပါတယ်။ ဥပမာ။
<!DOCTYPE html>
<html>
<head>
    <title>CSS</title>
    <style>
    p {
        color: blue;
    }

    .sample {
        color:green;
    }
    p.sample {
        color:red;
    }
    </style>
</head>
<body>
<p>Only tag</p>
<div class="sample">Div sample class</div>
<p class="sample">Sample class with p tag</p>
</body>
</html>
အထက်ပါ code ကို ကြည့်ရင် အောက်ကလို မြင်ရပါမယ်။
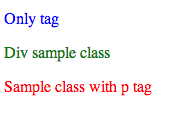
Figure 3-6
sample class ကို ၂ နေရာမှာ သုံးထားပါတယ်။ div tag နဲ့ p tag ပါ။ p.sample လို့ ရေးထားတဲ့ သဘောက p tag ဖြစ်ရမယ်။ class ကို sample ဖြစ်ရမယ်လို့ ဆိုလိုတာပါ။
Apply a Style Using an ID
တကယ်လို့ tag နဲ့ id ကို တွဲရေးမယ် ဆိုလည်း ရပါတယ်။ အောက်က ဥပမာ ကို ကြည့်ကြည့်ပါ။
<!DOCTYPE html>
<html>
<head>
    <title>CSS</title>
    <style>
    p {
        color: blue;
    }

    .sample {
        color:green;
    }
    p.sample {
        color:red;
    }

    p#sample {
        color:gray;
    }
    </style>
</head>
<body>
<p>Only tag</p>
<div class="sample">Div sample class</div>
<p class="sample">Sample class with p tag</p>
<p id="sample">Sample ID with p tag</p>
</body>
</html>
အဲဒီ code ကို အောက်ကလို မြင်ရပါလိမ့်မယ်။
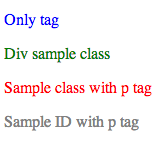
Figure 3-7
p#sample ဆိုပြီး p Tag ဖြစ်ပြီး sample ID ဖြစ်တာကို စာလုံး ခဲရောင်ပြောင်းထားတာကို တွေ့နိုင်ပါတယ်။
Link to Media-specific Style Sheets
ကျွန်တော်တို့တွေ CSS ကို အသုံးပြုတဲ့အခါမှာ browser ပေါ်မှာ ပေါ်တဲ့ CSS နဲ့ print ထုတ်တဲ့ အခါမှာပေါ်တဲ့ CSS သီးသန့် ခွဲထုတ်ထားလို့ရပါတယ်။ အောက်က ဥပမာ လေးကို အရင် ကြည့်ရအောင်။
<!DOCTYPE html>
<html>
<head>
    <title>Media</title>
    <link rel="stylesheet" type="text/css" href="blue.css" media="screen">
    <link rel="stylesheet" type="text/css" href="purple.css" media="print">
</head>
<body>
<h1>Media-specific Style Sheets</h1>

<p class="special">Sample Text. Blue for screen and purple for print.
</body>
</html>
အဲဒီ မှာ media="screen" နဲ့ media="print" ဆိုပြီး ရေးထားတာကို တွေ့နိုင်ပါတယ်။ screen ဆိုတာကတော့ browser ကနေ ကြည့်တဲ့ အခါမှာ ပေါ်ဖို့ သီးသန့် အတွက်ပါ။ print ကတော့ print ထုတ်တဲ့ အခါမှာ အသုံးပြုဖို့ css ပါ။ default value ကတော့ all ပါ။
blue.css မှာ ဒီလိုရေးထားပါတယ်။
.special {
    color: blue;
}
purple.css မှာတော့ ဒီလိုရေးထားပါတယ်။
.special {
    color: purple;
}
အောက်က ပုံလေးကို ကြည့်ကြည့်ပါ။ Print ထုတ်တဲ့ အခါနဲ့ browser ပေါ်မှာ မြင်ရတဲ့ ပုံ မတူတာကို တွေ့နိုင်ပါတယ်။
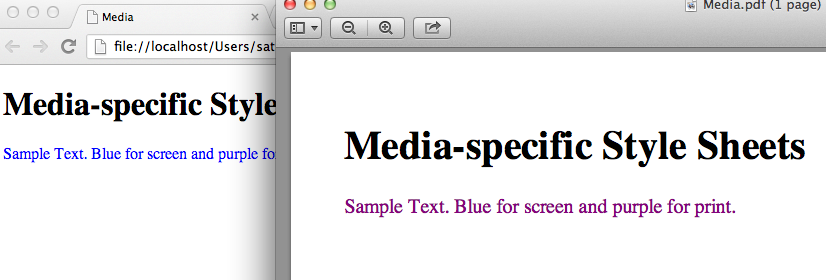
Figure 3-8
Link to Style Sheets for Mobile Phones
အခုနောက်ပိုင်းမှာ mobile phone တွေ လူသုံးများလာတဲ့ အညီ css ကိုလည်း mobile တွေပေါ်မှာ ကောင်းစွာ ပေါ်အောင် ပြုပြင်ရေးဆွဲရပါတယ်။
<!DOCTYPE html>
<html>
<head>
    <title>Media</title>
    <link rel="stylesheet" href="ipad-style.css" media="only screen and (max-width: 1024px)">
    <link rel="stylesheet" href="iphone-style.css" media="only screen and (max-width: 480px)">
</head>
<body>
<h1>Media-specific Style Sheets</h1>

<p class="special">Sample Text. Blue for screen and purple for print.
</body>
</html>
အထက်ပါ code မှာ media="only screen and (max-width: 1024px)" နဲ့ media="only screen and (max-width: 480px)" ဆိုတာကို တွေ့နိုင်ပါတယ်။
max-device-width ဆိုတာကတော့ device width ရဲ့ အမြင့်ဆုံး အရွယ်အစားဆိုရင် ဒီ style ကို အသုံးပြုဆိုပြီး ရေးသားထားတာပါ။ ipad ရဲ့ အကျယ်ဆုံး device width က 1024 ပါ။ iPhone ရဲ့ ဒေါင်လိုက် အရွယ်မှာ အကျယ်ဆုံးကတော့ 480px ပါ။ max-width မှာ ထည့်ထားတဲ့ width ရောက်မှသာ အဲဒီ css က အလုပ်လုပ်မှာ ဖြစ်ပါတယ်။ တခြားအချိန်တွေမှာတော့ အလုပ်မလုပ်ပေးပါဘူး။
တကယ်လို့ ကျွန်တော်တို့တွေ အနေနဲ့ css file မှာ media queries ကို အသုံးပြုချင်ရင် အောက်ကလို အသုံးပြုနိုင်ပါတယ်။
/* default CSS */
.special {
    color: blue;
}

@media screen {
    .special {
        color:blue
    }
}

@media print {
    .special {
        color:purple;
    }
}

/* for iphone */
@media screen and (max-width: 480px) {
    .special {
        color :red;
    }
}

/* for iphone */
@media screen and (max-width: 1024px) {
    .special {
        color :green;
    }
}
အထက်ပါ code လေးက လွယ်လွယ်ကူကူနဲ့ ရှင်းရှင်းလင်းလင်း နားလည်နိုင်ပါတယ်။ အထက်ပါ code မှာ screen , print နဲ့ iphone , iPad တို့အတွက် css တွေ အကုန် ပေါင်းရေးထားပေးပါတယ်။ media queries ရေးတဲ့ အခါမှာ { နဲ့ စပြီးတော့ } နဲ့ ဆုံးပါတယ်။ အဲဒီ ကြားထဲမှာ သက်ဆိုင်တဲ့ CSS ကို ရေးပေးဖို့လိုပါတယ်။
Styles for Nested Tags
CSS ကို အသုံးပြုရမှာ ကျွန်တာ်တို့တွေ အနေနဲ့ class တွေ tag တွေကို အဆင့်ဆင့် ပြီး အသုံးပြုလို့ရပါတယ်။ အောက်က code လေးကို တချက်လေ့လာကြည့်ရအောင်။
<!DOCTYPE html>
<html>
<head>
    <meta charset="UTF-8">
    <title>Nested CSS</title>
    <link rel="stylesheet" href="style.css">
</head>
<body>
<section class='first'>
    <p>This is first paragraph.</p>
    <div id="example">
        <p>This is second paragraph.</p>
    </div>
</section>

<section class='second'>
    <p>This is first paragraph.</p>
    <div id="example">
        <p>This is second paragraph.</p>
    </div>
</section>
</body>
</html>
အထက်ပါ code မှာ ကျွန်တော် section ၂ ခုကို အသုံးပြုထားပါတယ်။ ပထမ section မှာ paragraph ၂ခု ပါသလို ဒုတိယ section မှာလည်း paragraph ၂ ခု ပါပါတယ်။ သူ့မှာ သုံးထားတဲ့ style.css ကို ကြည့်ကြည့်ရအောင်။
p {
    color:red;
}
section.first p{
    color:blue;
}

section.second > p {
    color: purple;
}
တကယ်လို့ ကျွန်တော်တို့တွေ paragraph အားလုံးရဲ့ စာကို ပြောင်းချင်ရင် p လို့ ခေါ်လိုက်ရင်ရပါပြီ။ သို့ပေမယ့် ပထမ section ရဲ့ paragraph ကို သာ အရောင်ပြောင်းချင်တဲ့အတွက် section.first p ဆိုပြီး သုံးထားပါတယ်။ section tag ဖြစ်ရမယ် အဲဒီ tag ရဲ့ class က first ဖြစ်ရမယ်။ အဲဒီ first ရဲ့ အောက်က p တွေကို ဒီ css သုံးမယ်ဆိုပြီး ရေးထားတာပါ။
section.second > p ကတော့ နည်းနည်းလေး ကွဲပြာင်းပါယတ်။ section tag ဖြစ်ရမယ်။ class နာမည်က second ဖြစ်ရမယ်။ သူ့ရဲ့ အောက်က p ကို သာ ပြောင်းမယ်။ ကျွန်တော်တို့ .second ရဲ့ အောက်မှာ div တစ်ခု ရှိတာကို တွေ့နိုင်ပါတယ်။ အဲဒီ အောက်က p က .second အောက်မှာ ရှိတဲ့ p class မှာ မဟုတ်တော့တဲ့အတွက် သူက default color အနီ ရောင်သာ ပြနေပါလိမ့်မယ်။
အဲဒီ code လေးကို run လိုက်ရင် အောက်ကလိုမျိုးလေး မြင်ရပါလိမ့်မယ်။
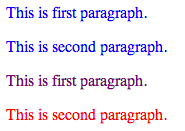
Figure 3-9
အခု ဆိုရင် chapter 3 ပြီးဆုံးပါပြီ။ Chapter 3 မှာ CSS နဲ့ ပတ်သက်ပြီး အခြေခံ အဆင့်ထိ သိလောက်ပြီလို့ ထင်ပါတယ်။ Chapter 3 မှာ tag , class , ID စတာတွေကို CSS နဲ့ တွဲသုံးပြီး သုံးနည်းကို ဖော်ပြထားပါတယ်။ နောက်ပြီး chapter မှာတော့ text styling နဲ့ ပတ်သက်ပြီးတော့ ဆက်လက် လေ့လာနိုင်ပါတယ်။